
Your kids will love this Easter tradition, dyeing Easter Eggs naturally with no harmful dyes. Did you know that red cabbage makes a blue dye? An easy and natural way to enjoy your Easter eggs. You'll also love Red Easter Eggs too!
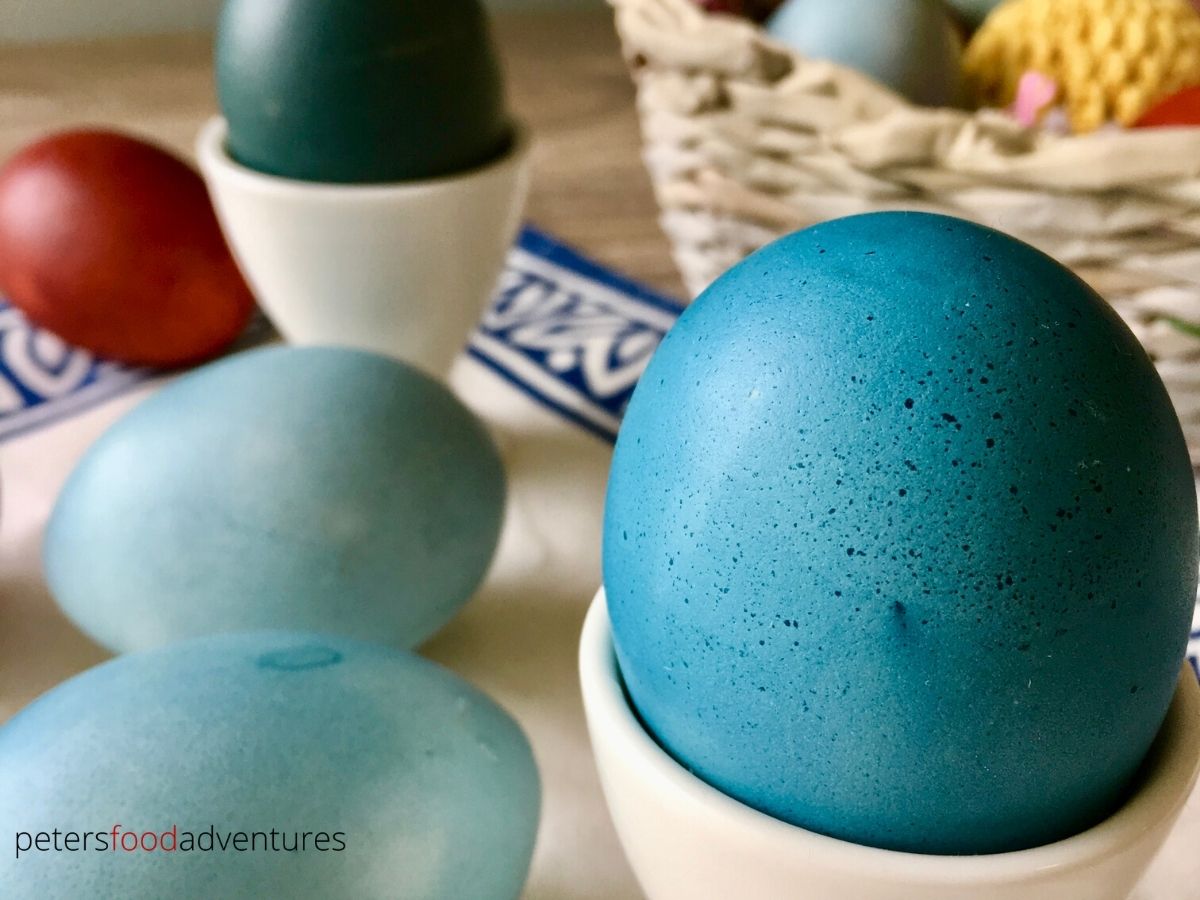
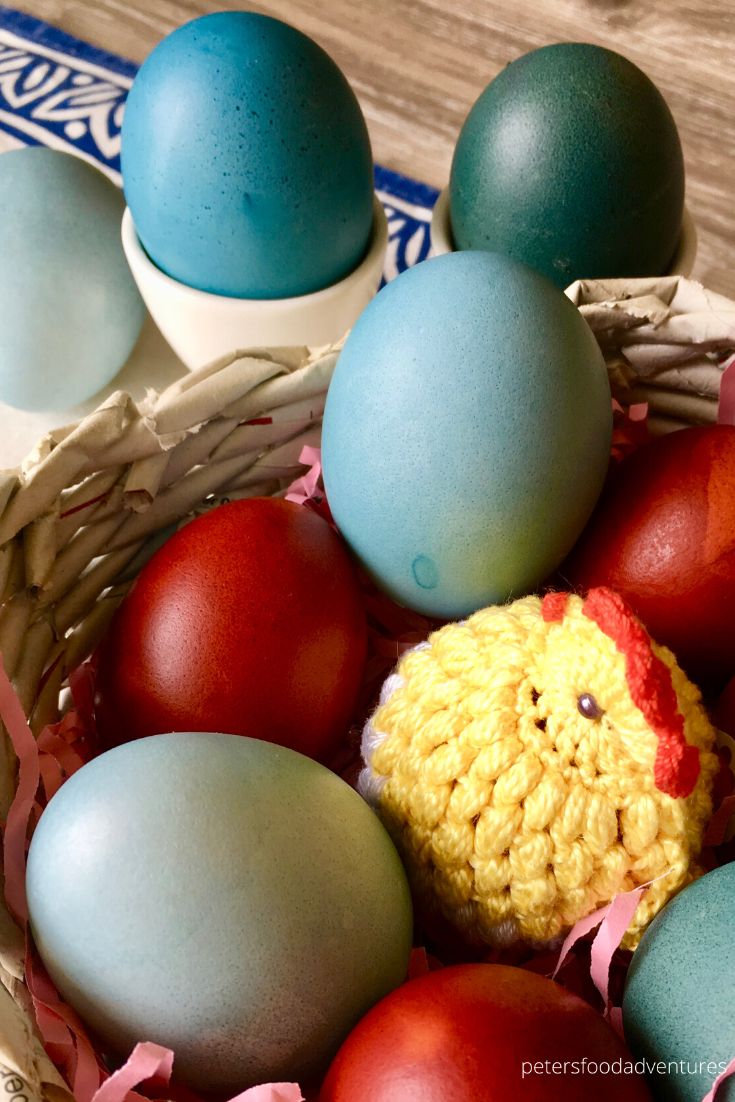
Coloring Easter eggs is a wonderful tradition I grew up with. Dyeing Easter Eggs with Red Cabbage will produce a natural purple dye, which colors your eggs into shades of blue. It's a strange color thing that happens, I'm sure there is a scientific reason why, but all I care about is the cool blue easter eggs!
Growing up, we usually dyed Easter eggs using onion skins, which is a traditional Russian and Slavic way. This gave them a deep red brown color, but I always wanted colorful eggs, like the other kids at school. My mom wouldn't allow us to use store bought kits. The store bought kits use harsh dyes which are unhealthy for you, and there are many ways to naturally color eggs.
Why You'll Love This Recipe
- Natural - no unhealthy dyes
- Edible - you can eat these eggs, just keep them refrigerated
- Family Fun - a great weekend activity to do with your kids before Easter
Ingredients You'll Need
- Red Cabbage - must use red cabbage for the right color
- Vinegar - to help set the dye
- White Eggs - or try using brown eggs for color variations
- Vegetable Oil - to shine up your eggs before placing on table
How to Dye Easter Eggs
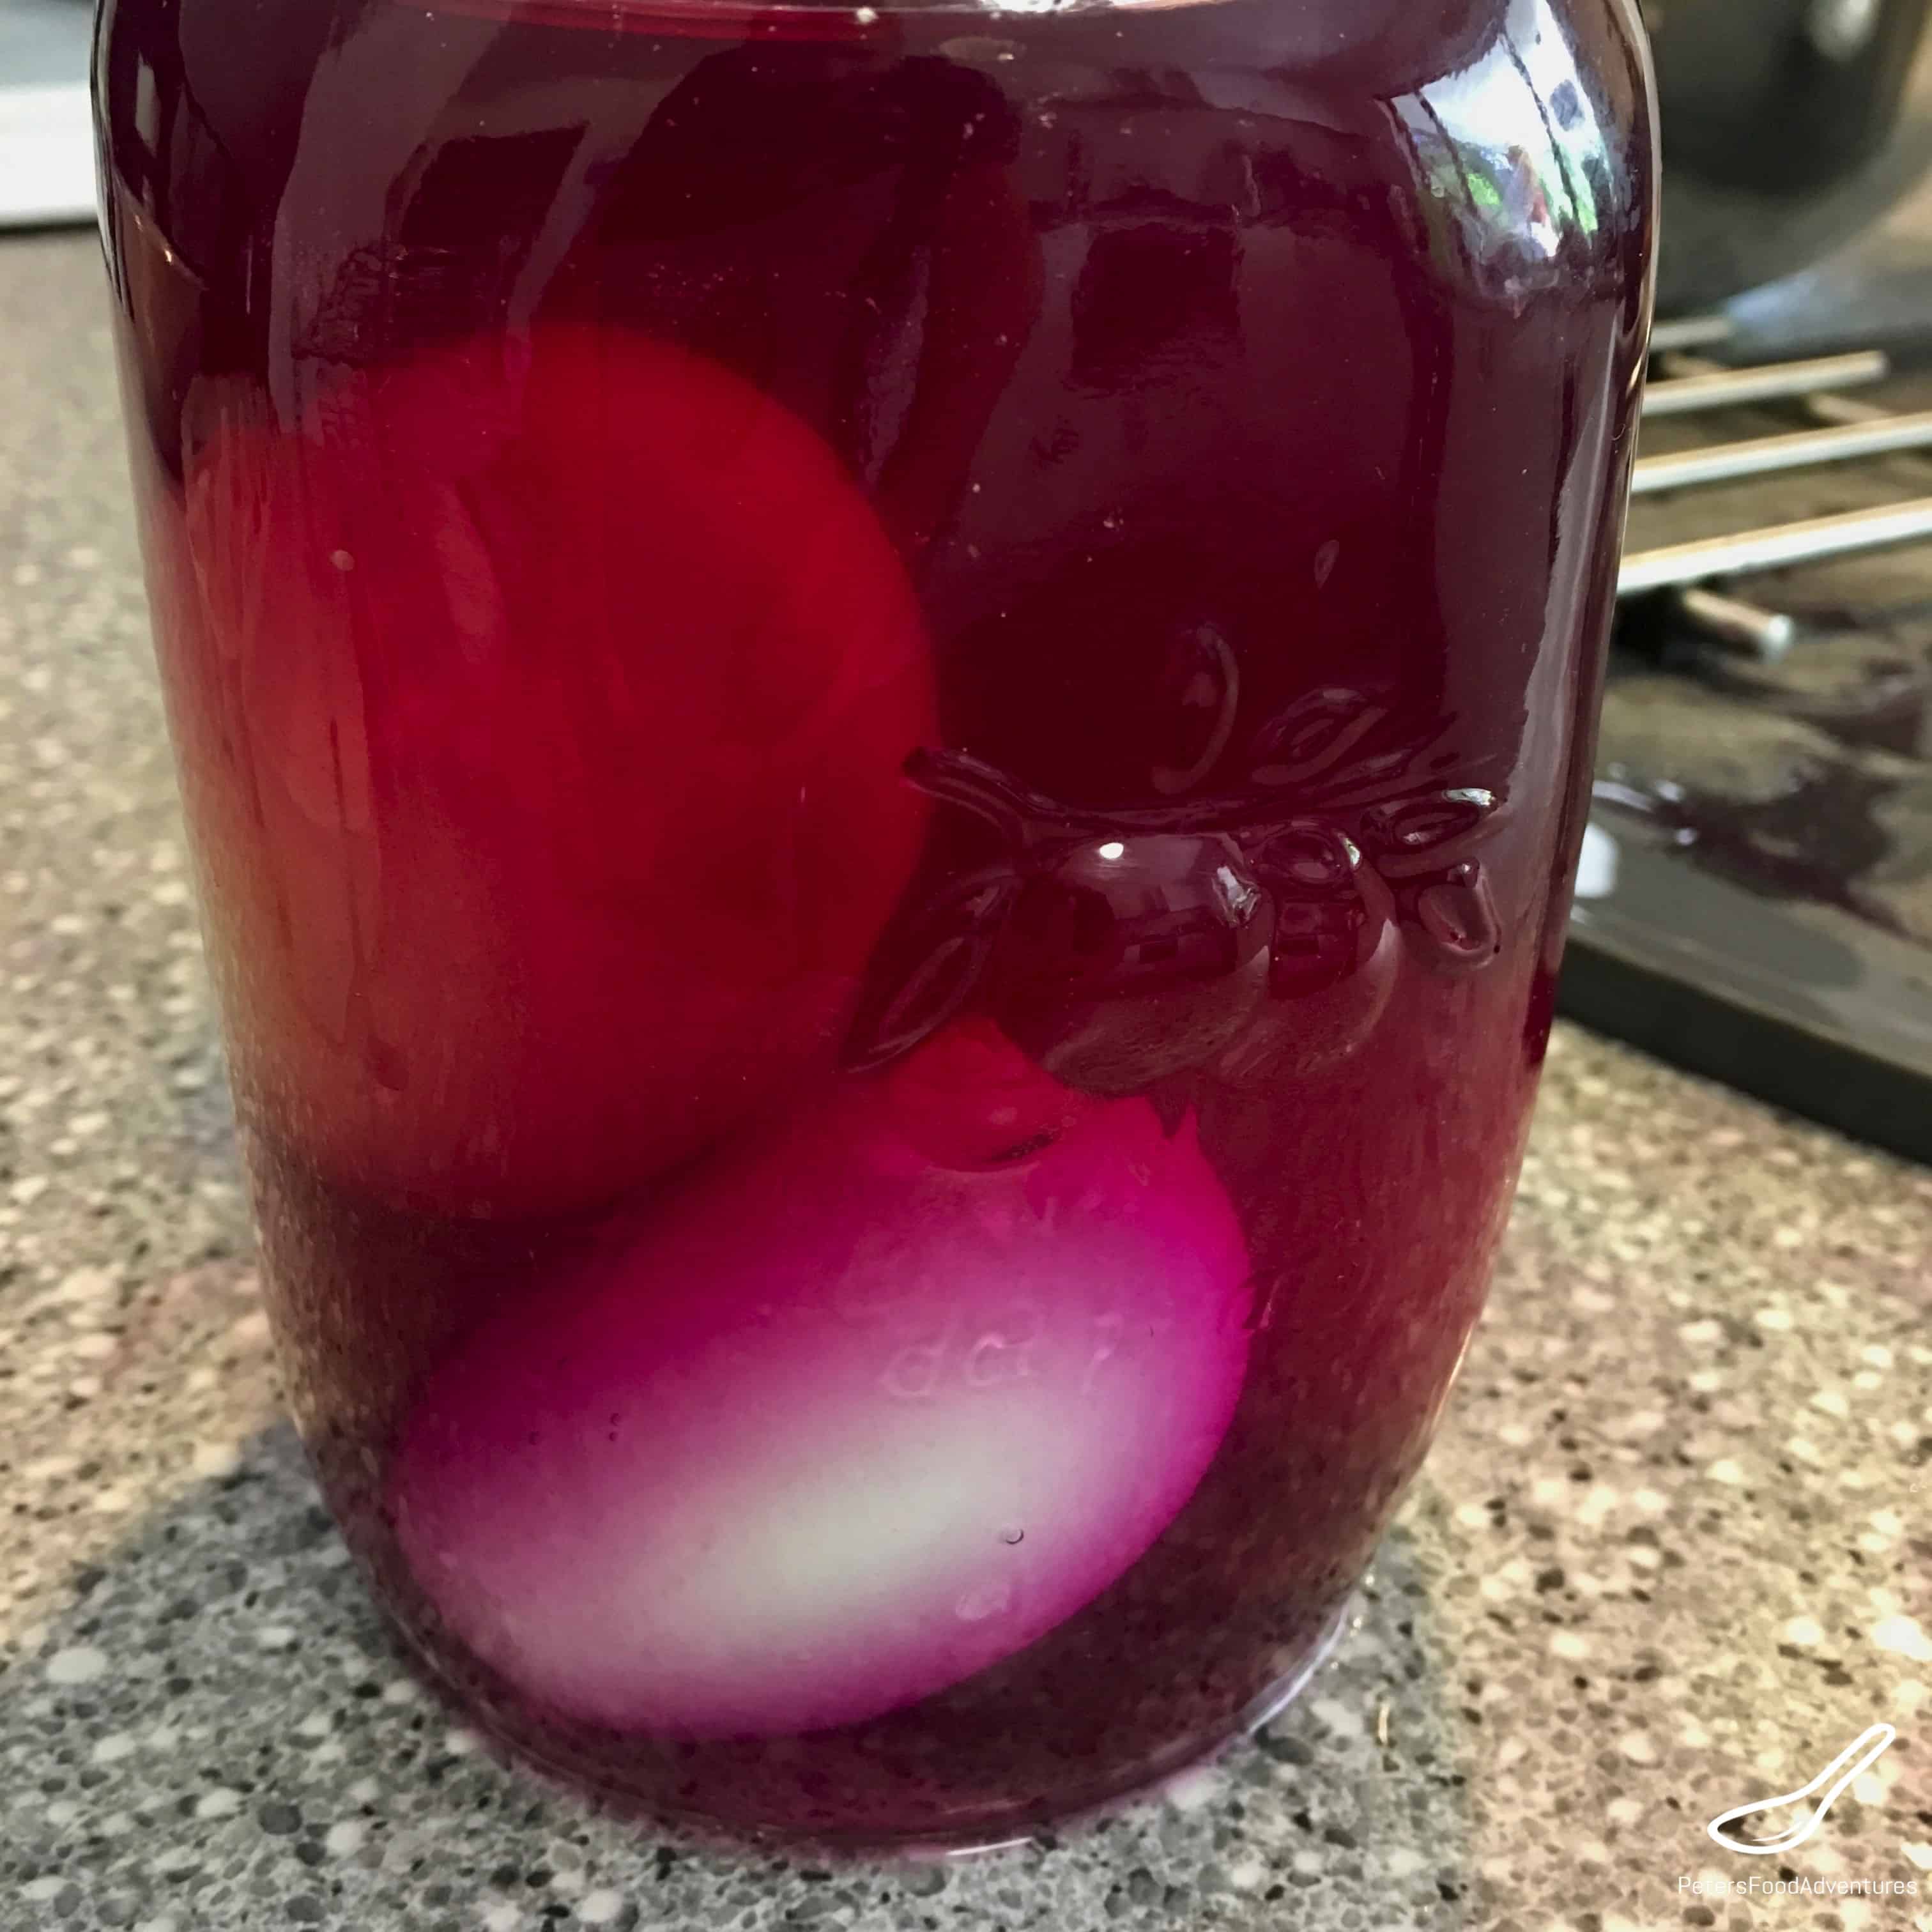
It doesn't take long to make the dye for blue Easter eggs. White eggs give a nicer blue color, while brown eggs give a darker blue-green color. The longer the eggs sit in the cabbage dye solution, the darker the blue will be. Use a mason jar to submerge the eggs in the cabbage dye in the fridge until the dye sets.
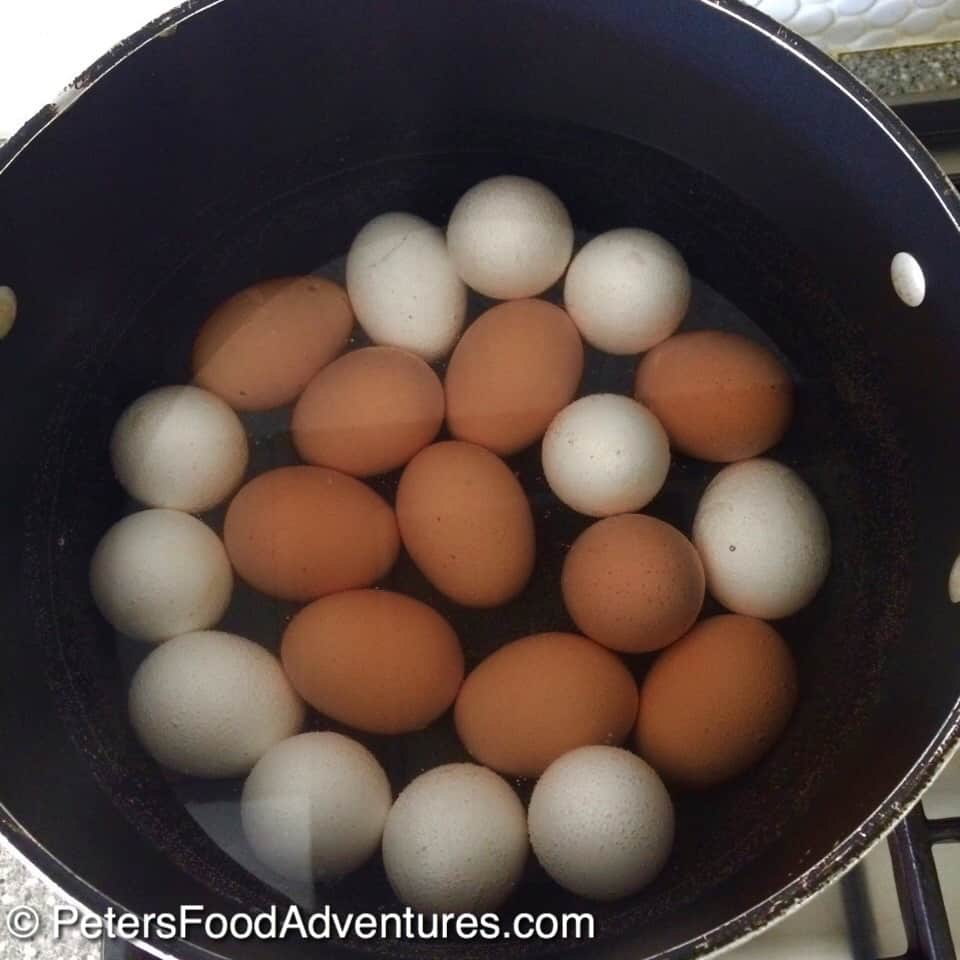
- Cook Hard Boiled Eggs - place eggs in a single layer in a large stockpot to reduce cracking. Cover with water and bring to a boil. When water comes to a boil, cover with lid and remove from heat for 12 minutes. Carefully cool by pouring cold water into pan. Remove and fully cool, don't use cracked eggs for dyeing, but use them for boiled egg recipes below. Pro Tip: cook extra eggs as some will crack.
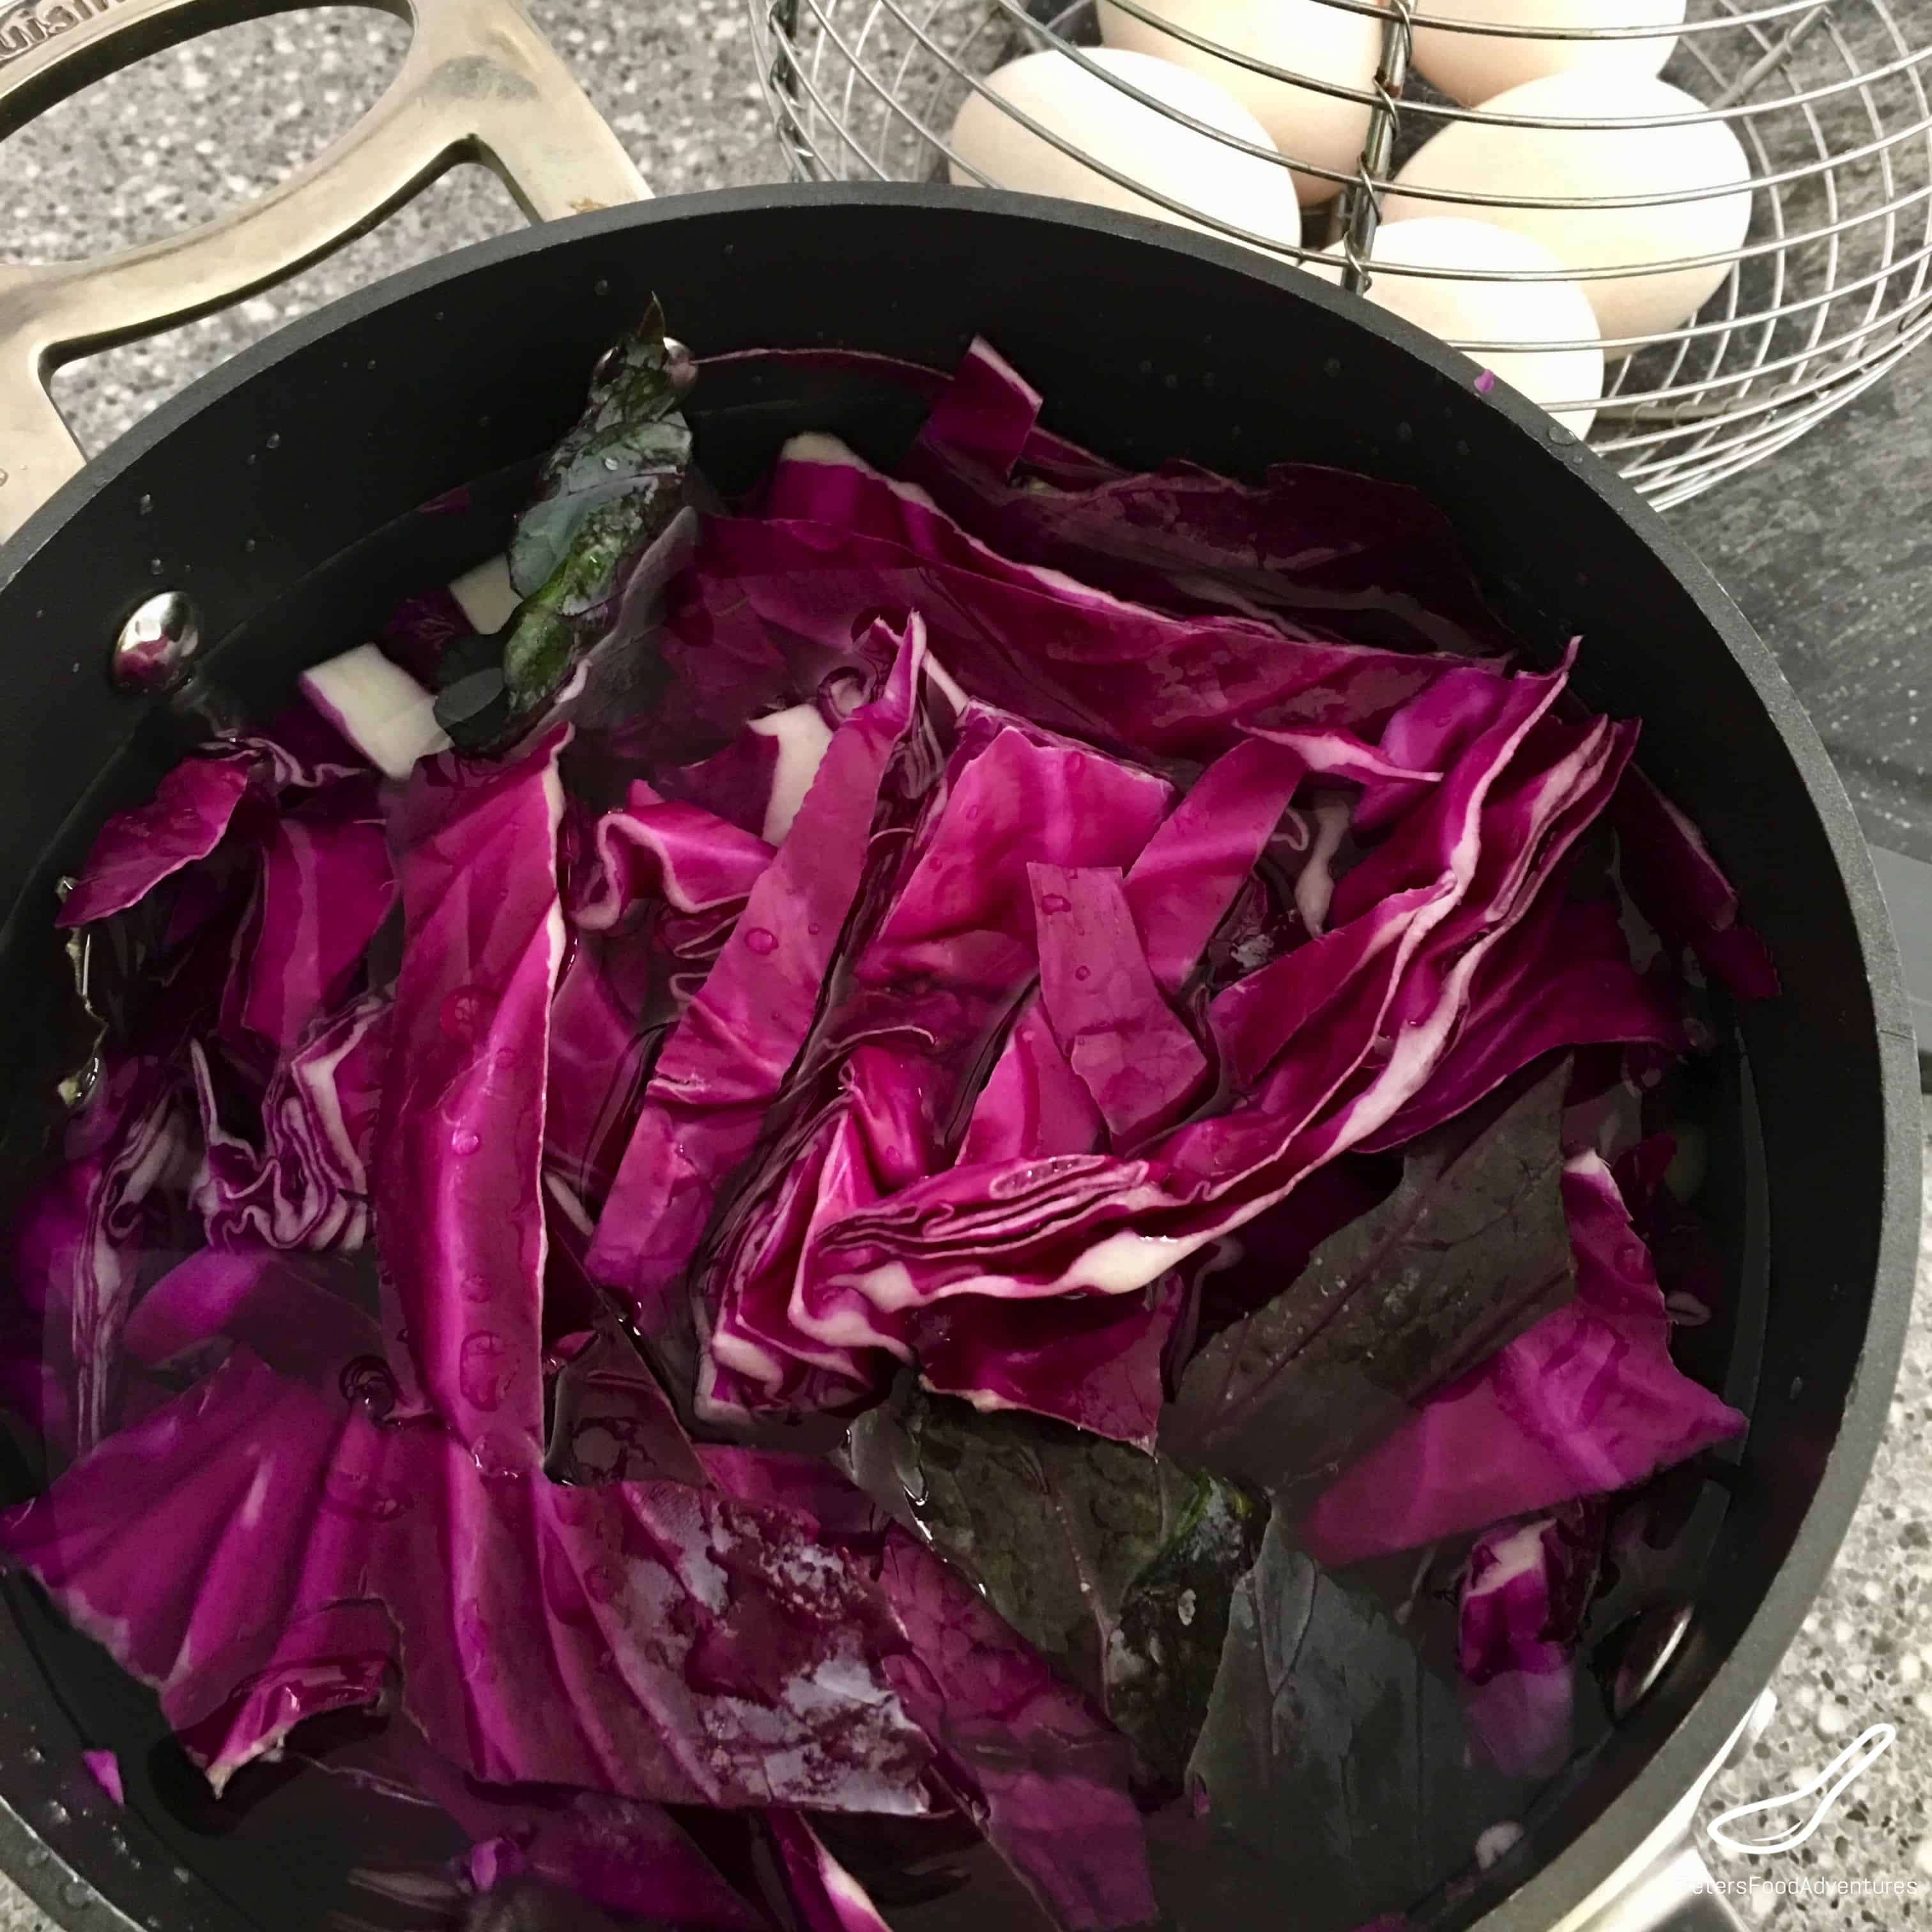
- Prepare Cabbage - coarsely cut red cabbage and place into pot. Bring to a boil and simmer for 30 minutes
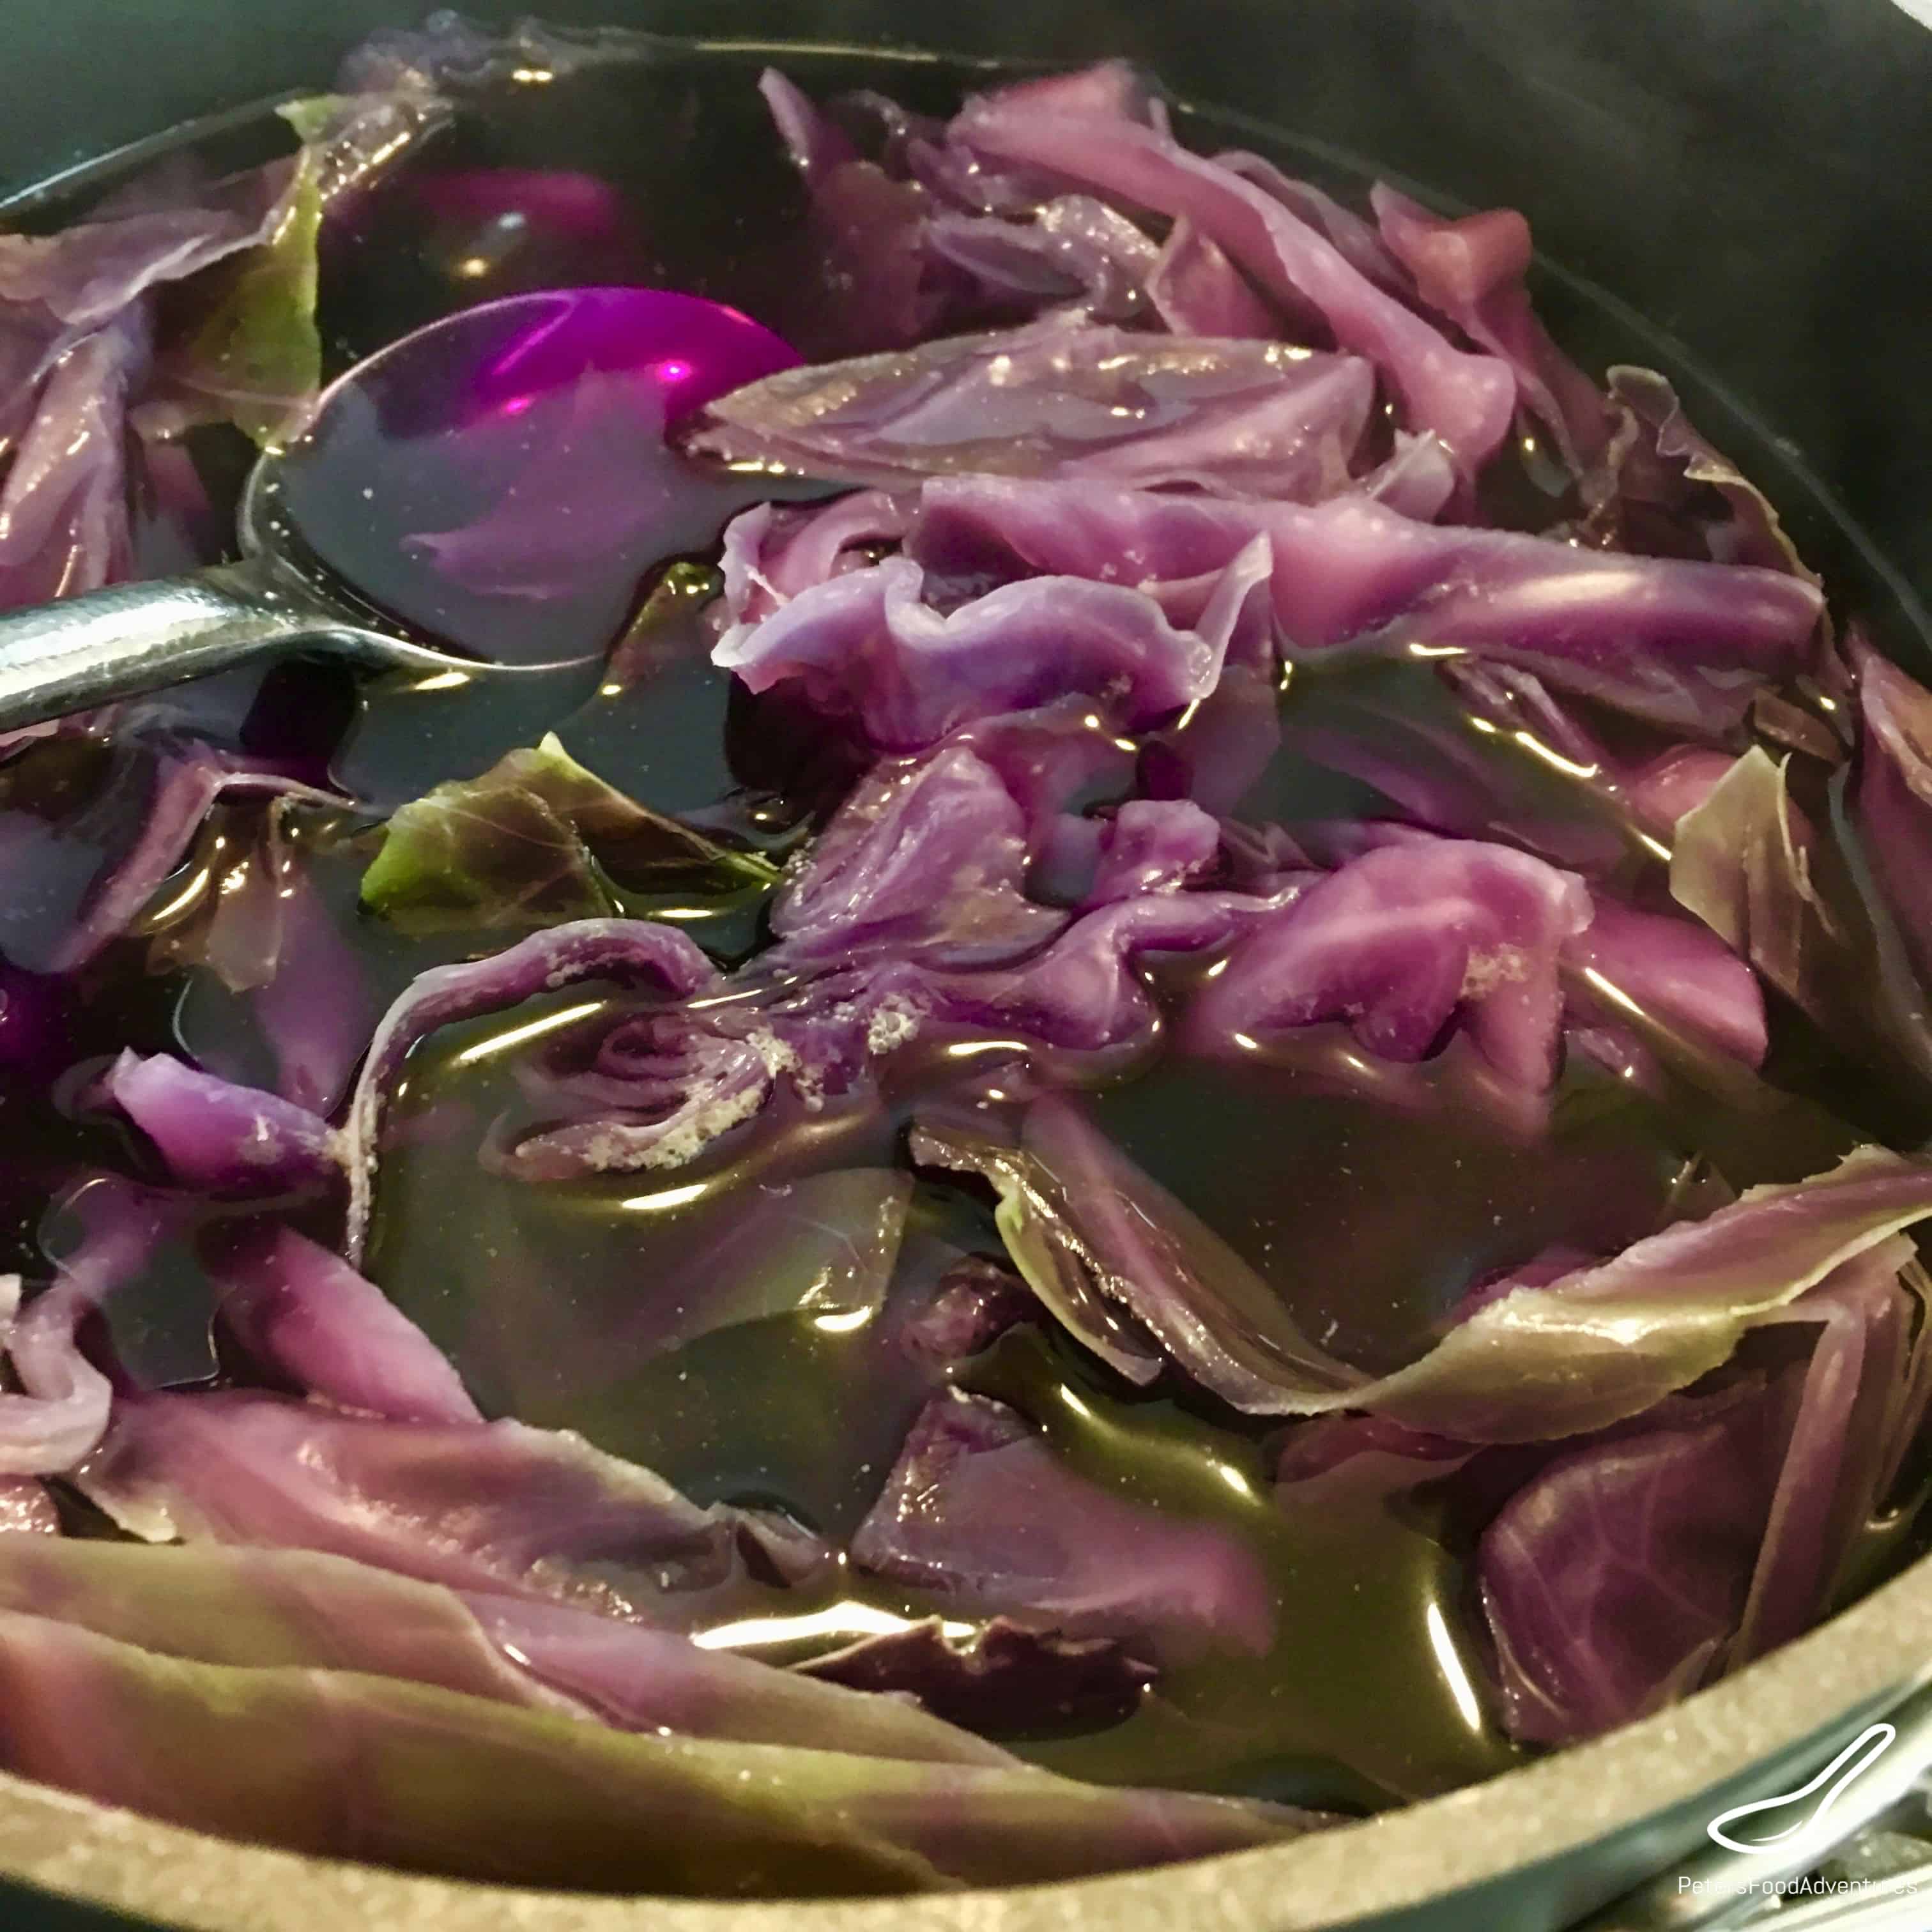
- Strain - separate cooked cabbage and purple water. Stir in vinegar and allow dye to cool before using.
- Lower Eggs - Place blue cabbage dye into wide mouth mason jar. Lower legs into jars using tablespoon. Place in fridge for dye to set.
- Refrigerate - keep eggs and dye in the fridge, best overnight for darkest color.
- Remove Eggs - place eggs on cooling rack until they are completely dry, or pat dry. For shiny eggs, wipe a drop of vegetable oil on the blue eggs.
- Refrigerate - keep eggs refrigerated until ready to serve on Easter.
Dyeing Easter Eggs Naturally
Red cabbage isn't the only way to naturally dye Easter eggs. Follow the instructions above, but change out the cabbage for different dye ingredients.
- Onion skins - Dark Orange to Rust Brown (depending on white or brown eggs)
- Turmeric = Pale Yellow eggs - just mix into boiling water
- Chopped Red beets = Pink-ish (on white eggs)
- Red onion skins = Pale purple
- Red cabbage = Blue eggs
- Coffee = Tan (on white eggs - looks like regular brown egg)
- Raspberries = Pink (careful, frozen raspberries are expensive)
Slavic Easter Egg Traditions
This is an Orthodox tradition, where you try to crack each others Red Easter Eggs. Hold the egg in one hand (vertically), and ask someone to crack the top of your egg while they hold their egg, hoping that their own egg won't crack. Return the favor and try to crack their egg.
The cracked eggs symbolize the resurrection of Christ from the tomb. The red/brown dyed eggs are supposed to symbolize the blood of Christ. Blue eggs don't symbolize anything, they're just pretty!
Can You Eat Dyed Easter Eggs?
Now in case it's not clear, you can eat dye Easter eggs if they remain refrigerated. The harsh dyes and chemicals aren't healthy, as they leach into the cooked egg whites. Remember, always keep your dyed eggs refrigerated until you place them on the Easter table for everyone to enjoy.
Hard Boiled Egg Recipes To Try
So what can you do with a dozen hard boiled Easter eggs? Use them of course! Here are some tasty egg recipes to try! Remember to keep the eggs refrigerated!
- Olivier Potato Salad
- Hard Boiled Eggs for Easter breakfast
- Jalapeno Popper Devilled Eggs
- Egg Salad Sandwich
- Cobb Salad
- Eggs with Ramen or Asian Instant Noodle Soup
- Add to Caesar Salad
Can You Make Hard Boiled Eggs in Advance?
Yes, hard boiled eggs can be cooked in advance and kept in and airtight container in the fridge. They should last for up to a week in advance.
How Long Can You Leave Hard Boiled Eggs on Table?
After you take your dyed Easter eggs out of the fridge, they should only be on the table for 2 hours. Any longer increases risk of getting sick, so keep them refrigerated.
Easter Lunch Recipes to Try!
- Roast Lamb for Easter
- Paska Easter Bread with White Chocolate
- Easy Chocolate Bird's Nest Cookies
- Instant Pot Greek Lamb
- Coca-Cola Ham
- Garlic Asparagus - Air Fryer and Oven Instructions
Dyeing Easter Eggs Blue with Red Cabbage is super easy and a tastier and healthier Easter tradition to start with your family. Bon Appetit! Приятного аппетита!

Ingredients
- 1 cup coarsely chopped red cabbage per every 1 cup of water
- 1 tablespoon vinegar for every cup of strained dye
- 1 dozen white eggs (hard boiled) feel free to experiment by adding some brown eggs
- Vegetable oil for shining the eggs
Instructions
- Coarsely cut 5 cups red cabbage leaves and put into pot. Add 5 cups of water and bring to a boil. Let simmer on low for approx. 25-30 minutes. You will see the colour turn a purple colour.
- Strain the cabbage from the water. Add 1 tablespoon of vinegar per cup of dye and stir throughout. Allow the dye to cool before you use it.
- Place the blue cabbage dye into a wide mouth glass jar. Carefully lower the eggs into the jars using a tablespoon. For lighter blue eggs, soak the eggs for 4-6 hours, and remove when you are happy with the color. For deeper blue eggs, soak the eggs overnight in the refrigerator.
- Place the eggs on a cooling rack until completely dry. If you like shiny eggs, add a few drops of vegetable oil, and wipe carefully using a cloth.
- Keep the dyed eggs refrigerated until you are ready to eat them on Easter morning.
Video
©PetersFoodAdventures.com *originally posted April 2017, updated April 2023